At what point in our transition from kidhood to adulthood do we acquire that annoying habit of spending the Christmas holidays complaining about how many delightful treats are lying around just waiting to be put in our bellies? It’s a shame, really. We get one chance a year (okay, maybe two, if you get into Halloween in a big way) to revel in sugary, chocolatey gluttony, and we spend most of it feeling guilty. That’s crazytown, people!
Me, I love to wallow in sweet goodness throughout the holidays. I find that, by January, I’m more or less ready to move on, and then I like to wallow in atrociously healthy food for a while and feel all virtuous and self-congratulatory about how well I’m eating. (It’s how I roll through the calendar, people. Don’t you judge me.)
The great thing about this recipe is that you get to have your cake and eat it, too. This granola is better than even the best expensive “gourmet” granolas out there — I’ve tried a lot of them, and I speak with confidence here — so it has its own decadent appeal. And it has just the right amount of sweetness to gently ween you off your holiday-induced sugar addiction. And it’s so easy to make! Seriously! Five minutes of mixing ingredients, then pop it in the oven for 16-18 minutes, then cooling time. It doesn’t get much easier than that.
The cooking time here is just a suggestion. 18 minutes yields a nice crunchy (but not roof-of-your-mouth-shredding crunchy) texture. Reducing cooking time to 15 or 16 minutes will give you a slightly chewier consistency.
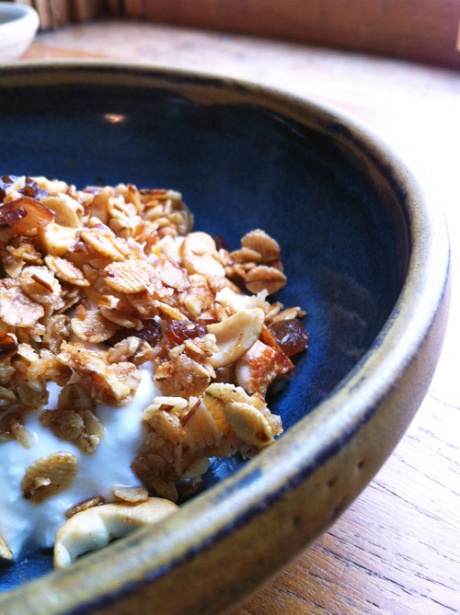
The ingredients are also just suggestions. I always start with 3 cups of rolled oats (or other rolled grains; I used barley for the batch in these photos, as I was experimenting for a friend who’s allergic to oats), but I didn’t have sunflower seeds, so I threw in some extra cashews and almonds. You can also experiment with raw pumpkin seeds, flax seeds, walnuts, hazelnuts… you get the gist. So long as your total quantity of dry ingredients comes out to more or less the required total , you’re hunky-dory.

DIY Easy Gourmet Granola
IMPORTANT: If you’ve never made homemade granola before, a key thing is to NOT break up the sheet of cooked granola until after it’s completely cooled. If you do this while it’s still warm, you’ll break up all the elements and won’t end up with any of those lovely clusters that are a hallmark of great granola. Also, don’t make the rookie mistake I made the first time I baked my own granola: I skimmed the instructions and didn’t see that the dried fruit goes in AFTER the granola has baked and cooled. Yeck.)
INGREDIENTS
3 cups rolled oats (or other rolled grain, such as barley)
1/4 cup sunflower seeds
1/2 cup sliced almonds
3/4 cup raw cashew pieces
(You can also substitute pretty much any kind of nut or seed you can think of for the sunflower seeds, almonds, and cashews.)
Handful of brown sugar
Handful of shredded coconut (optional)
1/2 teaspoon cinnamon
1/3 cup of honey
1/3 cup of light vegetable oil, such as sunflower or canola
1 tsp. vanilla
Cranberries, raisins, chopped dates, or whatever dried fruit you like in whatever quantity you like
DIRECTIONS
- Preheat oven to 350 degrees F.
- Combine all the dry ingredients in a large bowl.
- In a small bowl, whisk the oil, honey, and vanilla.
- Pour wet ingredients over dry and mix thoroughly, until dry ingredients have absorbed all the liquid.
- Spread mixture on a cookie sheet, preferably on parchment paper.
- Bake for 16-18 minutes, depending on how crunchy you want it to be. At the halfway point, remove from the oven and give it a good stir to ensure it cooks evenly.
- Remove from oven and allow to fully cool before breaking into chunks and adding dried fruit.
Storing:
You’ll want to keep this in an airtight bag or container, of course. I use a big canning jar with a rubber ring. And you don’t want to store it anywhere too warm; otherwise the honey will get melty, and you’ll run the risk of having your entire batch harden into a single huge clump.
I have no idea how long it keeps for, because I’ve never made a batch that survived longer than a week or so. So I can confidently tell you that it lasts for a week or so.

How much honey? It’s not in the list of ingredients.
How much honey did you use? Thanks.
Oops! It’s 1/3 of a cup of honey. Thanks for pointing this out! Coincidentally, I’m eating some of this granola right now with some vanilla Greek yogurt, and it’s fantastic. 🙂
[…] A Pound of Butter Recipes. Some healthy. Many not. All tasty. « DIY Easy Gourmet Granola […]